Water and Fire Damage: What to Do First, and What to Avoid

A leak or a fire creates panic because the damage feels urgent and unclear. Water slips behind baseboards and under floors. Smoke odor settles into fabrics and returns on humid days. You want fast action, but rushed action can spread damage, raise costs, and create safety risks.
This guide clears up common assumptions and gives you a simple staged plan. It fits Bay Area homes, where older construction, hills, and microclimates change how drying and repairs should happen. A foggy week in San Francisco slows drying. A hot inland day in Concord can dry the surface fast while moisture stays trapped underneath.
Myth: “If the surface looks dry, the area is fine.”
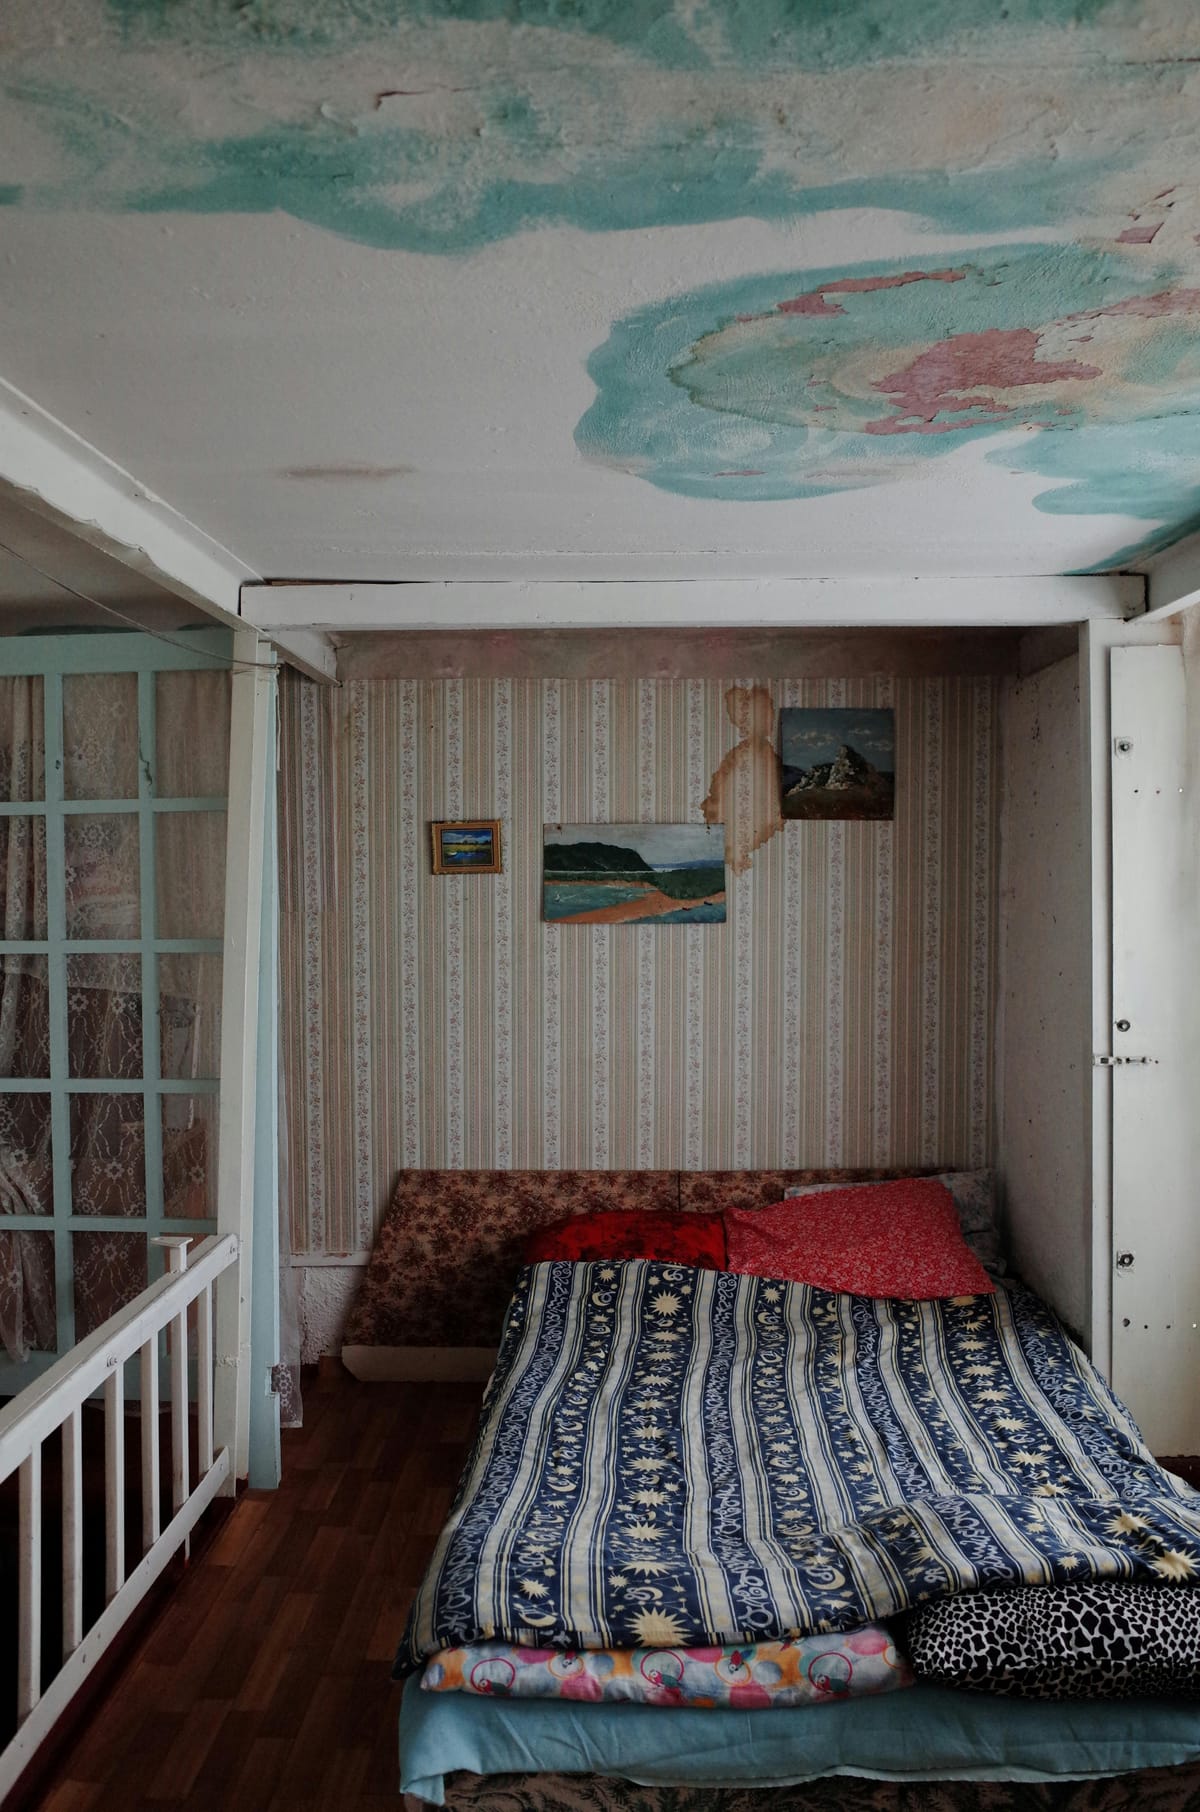
Reality: Water travels and wicks into drywall, insulation, subfloors, and cabinets. The surface often dries first. Trapped moisture then leads to swelling, odor, and hidden deterioration.
What to do instead
- Photograph the affected area right away (wide and close-up)
- Mark the visible water line on drywall with painter’s tape
- Check adjacent rooms and the level below for staining or odor
- Ask for an assessment when water reached walls, ceilings, floors, or built-ins
Myth: “Fans and heat fix everything.”
Reality: Airflow helps, but uncontrolled heat and airflow can push moisture deeper into cavities, or spread soot and ash after a fire. Drying works best when equipment placement matches the building layout and the type of loss.
What to do instead
- Start basic airflow in safe, unaffected areas
- Avoid blasting heat into wet materials
- Let a professional set equipment placement and containment for the affected zone
Myth: “Bleach is the answer for mold risk.”
Reality: Bleach does not solve moisture in porous materials. It can also irritate lungs and eyes. Mold risk drops when moisture drops, and when damaged porous materials are removed when needed.
What to do instead
- Focus on stopping the source and drying the structure
- Keep people and pets away from affected dust and debris
- Avoid mixing household cleaners (especially with ammonia)
Myth: “Insurance approval needs to happen before any work starts.”
Reality: Delays often increase damage. You still need documentation for the claim, but you also need to prevent further loss.
What to do instead
- Document with photos and video
- Save receipts for emergency steps
- Prevent further loss (tarp a roof opening, shut off water, board up a broken window)
- Ask the contractor to separate emergency stabilization from rebuild scope in writing
Myth: “Smoke smell goes away with time.”
Reality: Smoke residue embeds in porous materials. Odors often return on humid days, which are common in coastal Bay Area zones.
What to do instead
- Ask for a cleaning and deodorization plan that targets source materials, not only the air
The first hour: stabilize and document
Start with safety. Then prevent the damage from spreading.
If water is active
- Shut off the nearest valve, or the main water valve if you know the location
- Move rugs, baskets, and fabric items out of the wet zone
- Lift furniture legs off wet floors with blocks or towels
If water may have reached electrical
- Shut off power to the affected circuit only if you’re sure you have the right breaker
- If you’re unsure, leave power alone and call for help
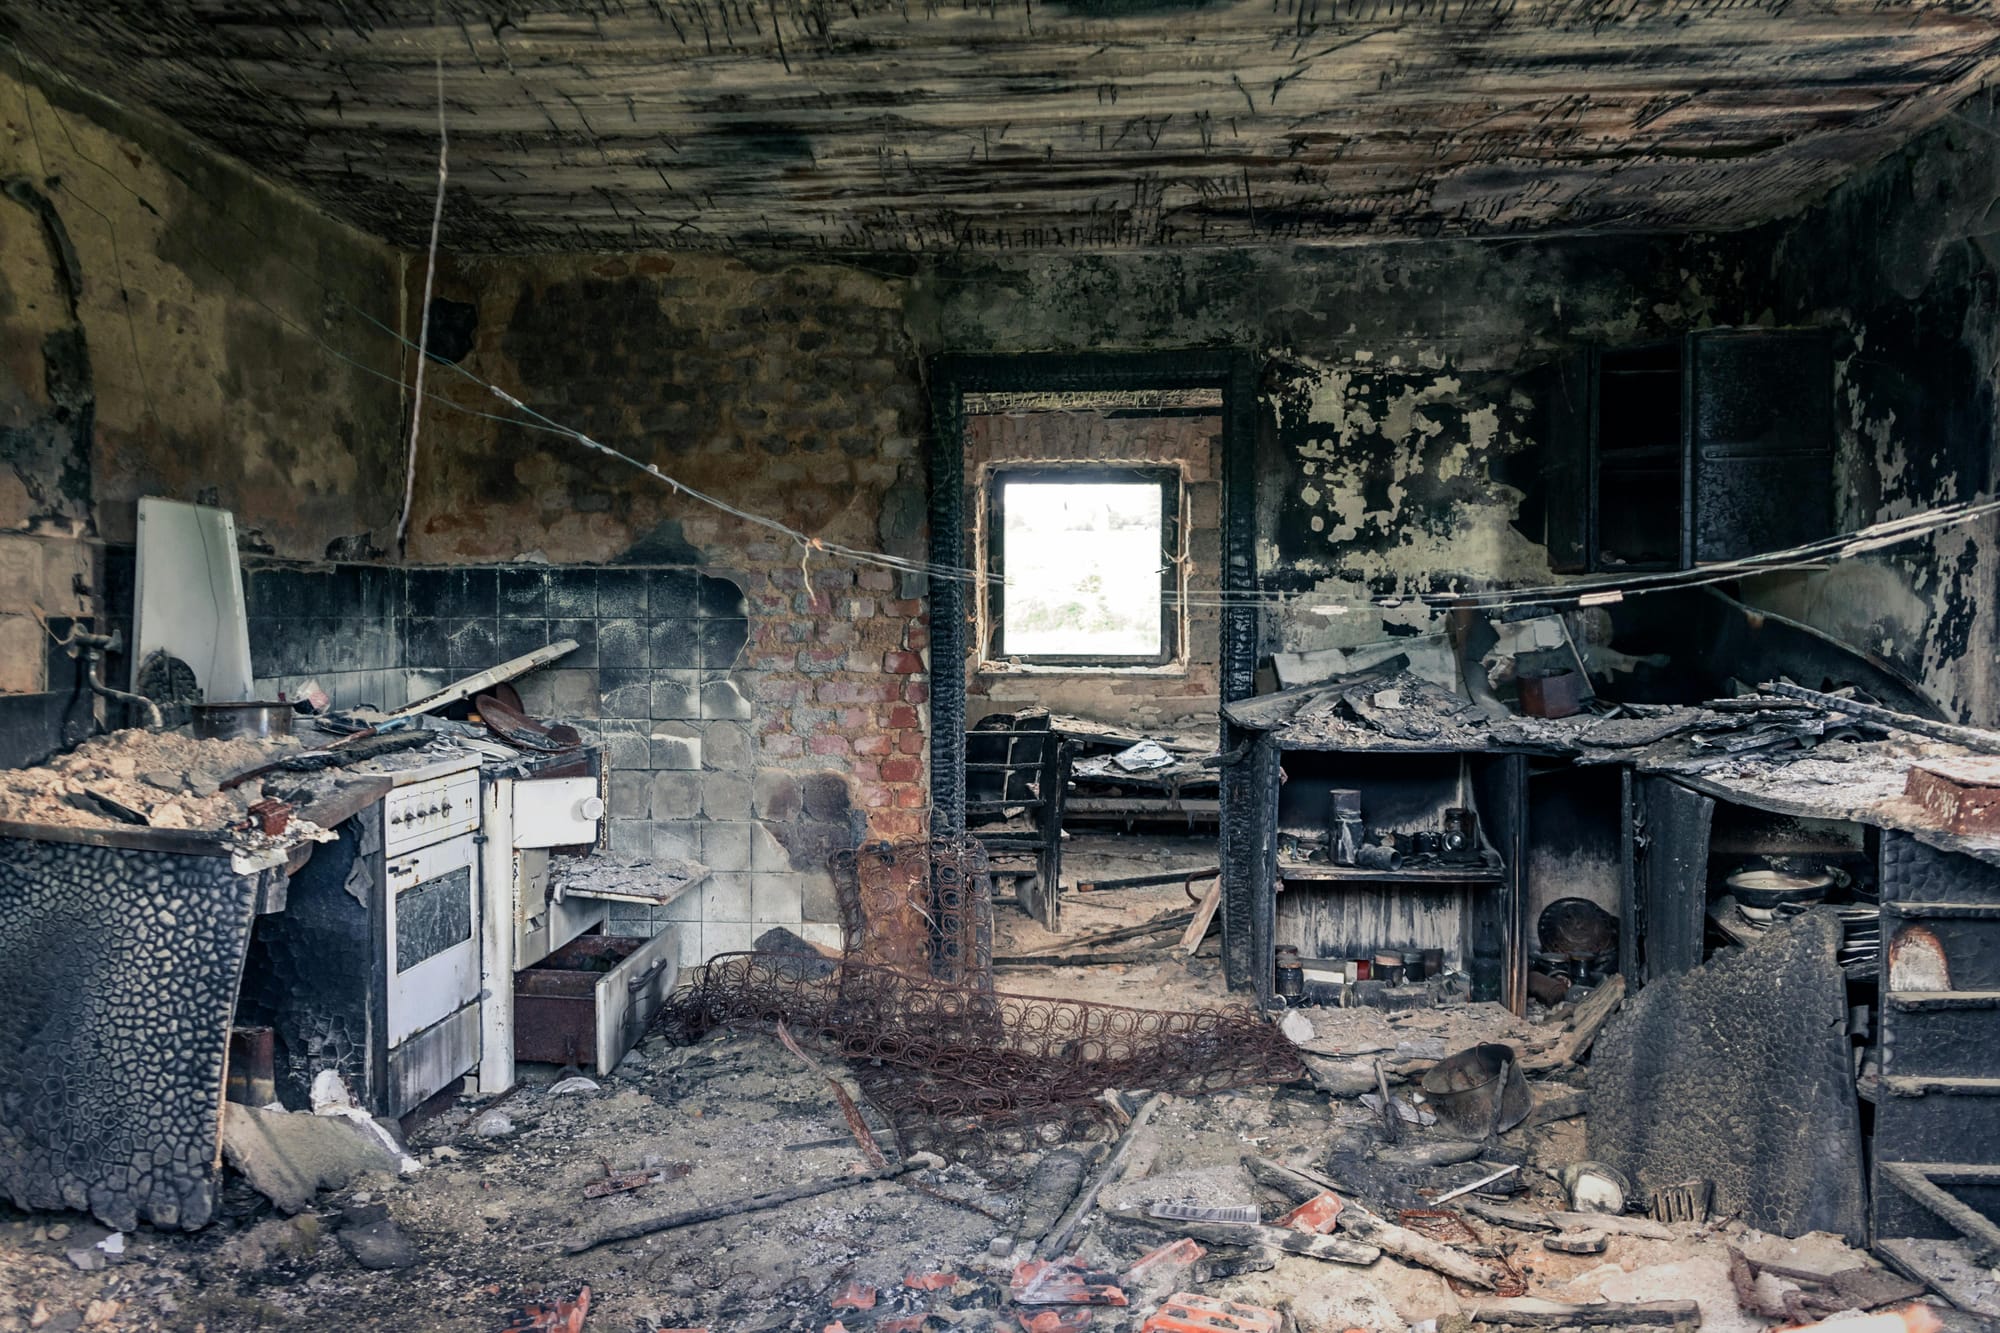
If there was a fire
- Don’t disturb soot-covered surfaces more than needed
- Keep doors closed to limit soot spread
- Ventilate only after the space is cleared as safe by the fire department
The first day: define scope and priorities
A good response separates the job into categories. This is where confusion (and scope creep) usually starts, so get it in writing.
Category 1: Emergency stabilization
Water extraction, initial drying, board-up, roof covering, and safety containment.
Category 2: Cleaning and remediation
Drying of cavities, removal of damaged porous materials, soot cleaning, odor control, and mold remediation if present.
Category 3: Rebuild and finish
Drywall, paint, flooring, cabinets, trim, and electrical or plumbing repairs.
Ask the provider for a written scope that labels which category each step falls into. It makes invoices and insurance conversations much cleaner.
Provider comparison without noise
Even in an emergency, you can compare providers quickly with the same script.
Ask each provider:
- What steps happen in the first 24 hours
- How they measure moisture and track progress (and how often)
- What containment they use to protect clean rooms
- What documentation they provide for you and the insurer
- Who manages the rebuild phase, if they offer rebuild
As a research reference while building a shortlist to contact, review Top Rated Water & Fire Damage Restoration Services for San Francisco Bay Area Homeowners, then use the questions above to compare scope and process.
Bay Area factors that affect restoration work
Older homes and mixed remodel eras
Plaster walls, old framing, and layered flooring can slow drying and complicate demolition. Hidden conditions show up fast once walls open.
Hills and drainage
On slopes, water often collects at downhill walls or near crawlspace access. A small leak can saturate soil and framing faster than you expect.
Microclimates
Coastal dampness slows drying. Inland heat speeds evaporation while raising warping risk if drying is too aggressive.
Permitting
Rebuild work involving structural changes, major electrical work, or plumbing relocation may trigger permits. Ask early what permit path is expected in your city.
A simple checklist for week one
Day 1–2
- Confirm the source is stopped
- Confirm the area is documented
- Confirm the drying and containment plan in writing
- Confirm who communicates updates and how often
Day 3–5
- Ask for moisture progress notes (what changed, what’s next)
- Ask what materials are staying vs. being removed (and why)
- Confirm debris disposal and protection of unaffected rooms
Day 6–7
- Confirm the transition plan from drying to rebuild
- Confirm upcoming selection needs (flooring, paint, cabinets) if rebuild is included
- Confirm what areas are safe for normal use
Mistakes that raise costs
- Skipping documentation, then struggling to explain damage later
- Removing materials without containment in larger losses
- Accepting vague scope statements like “full restoration” with no line items
- Rebuilding over an active moisture problem because the source wasn’t solved
Bottom line
A clear process lowers stress and reduces repeat damage. Stabilize first. Document early. Separate emergency work from rebuild scope. Ask for written steps and measured progress. Those actions keep a Bay Area restoration project moving in the right direction.